Last chance for Christmas and Hanukkah! Order by Nov. 10!  More Info
35% Off Sale + Free Locks

How to Order a Round Table Pad Now 35% Off: Starting at $257 with Free Locking System

Mail Order Form

Please print. If you need help, call us at 1-800-541-0271

Note: the browser you are using is an older version which cannot display this site accurately. For best results, upgrade to a new version of Chrome, Firefox, Safari or Internet Explorer.

Please enable JavaScript in your browser to use this site fully, or call us at 1-800-541-0271.

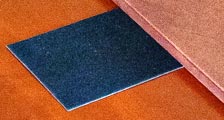
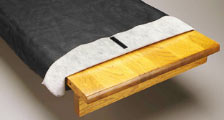
Slideshow: table protector pads; sections fold for storage
Photo Gallery

To order a round table pad, we simply need a few measurements. In Step 1 below, tell us how many inserting leaves you have (if any). Then follow the rules for measuring in Step 4.

Or you can call us at 1-800-541-0271 with your table manufacturer name and model number to see if we already have your table’s measurements. Where do I find the model number?

Model or style numbers can be found under your table, on a sales slip, or in an accompanying brochure; or call your store. Furniture retailers have been ordering this way for 100 years. Here are some of the manufacturers we have on file.

When you’re ready to order, click each of the 4 steps below to customize your table pad and calculate the price. You can order online or by phone.

1Shape

Table leaf animation

Choose the shape closest to your table (without leaves)

Choose rounded corners if the corners are not sharp

Choose the shape closest to your table (without leaves)


2Colors

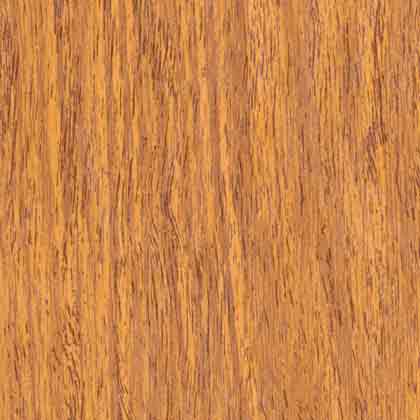
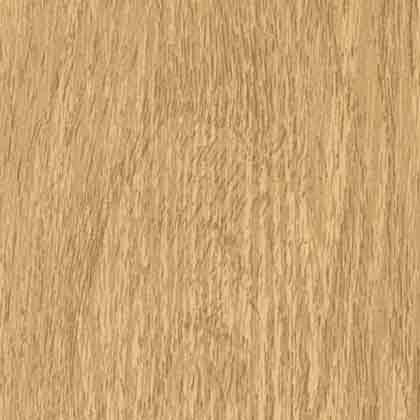
Choose a top color


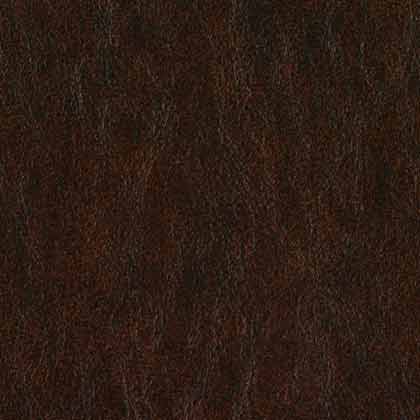
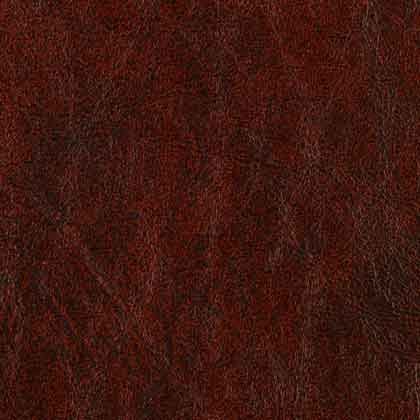
Choose a bottom color


3Locks & Storage Bags

Table Pad Locking Systems

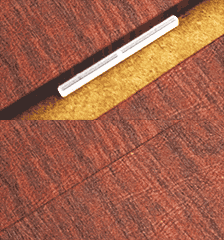
Fabric Snug-Locks are velour strips that act like Velcro hidden under the table pad. Dura-Locks are latches hidden along the abutting sections of the table pad.

Photo: Dura-Lock close-up Photo: Snug-Lock close-up

Table Pad Storage Bag

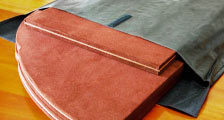
Photo: table pad bag with zipper Our table pad storage bag is made of heavy gauge vinyl with velcro closure. More

Leaf Storage Bags

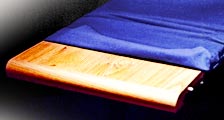
Our leaf storage bags, available in both 100% cotton flannel and vinyl, protect wooden leaves from scratches. More

Photo: wood leaf in blue flannel bag

Flannel bags
for leaves up to
50ʺ long
  $52 $Call


Flannel extra long
for leaves up to
72ʺ long
  $62 $Call


Photo: wood leaf in brown vinyl bag with lining

Vinyl bags
for leaves up to
50ʺ long
  $44 $Call


Vinyl extra long
for leaves up to
60ʺ long
  $54 $Call


4Measurements

Please choose a shape and number of leaves in Step 1 first.

Measurements to Take:

Questions? Call us at 1-800-541-0271.

Tip: scroll down for rules for measuring.
 

Table measurement diagram
Table padshape image
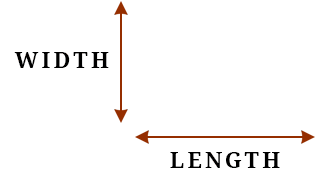
Arrow diagram: width is the table’s short dimension, length is the long dimension

Size of each drop leaf in inches               

Center section size

Table leaf diagram
Arrow diagram: size of each insert leaf is measured from crack to crack

Zero insert leaves—size of each leaf in inches

  First leaf

  Second leaf

  Third leaf

  Fourth leaf

  Fifth leaf

  Sixth leaf

Exclamation point symbolTo get a final price for seven or more insert leaves, you must call us at 1-800-541-0271.

If you have not called to verify that we have your table model number on file, then you must either determine the radius of one corner by printing and using our Corner Radius Guide (for round-cornered rectangles only), or you can leave the radius blank and make a paper pattern of your table:

What shape do the drop leaves have?

Corner radius from printed guide (optional—for round-cornered rectangles only)

If you have not called to verify that we have your table model number on file, then you must either measure the length of one of the clipped corners by printing and using our Clipped Corner Guide, or you can leave the corner length blank and make a paper pattern of your table:

Corner length (optional)

If you have not called to verify that we have your table model number on file, then you will need to mail us a paper pattern of your table.

If your table and leaves are perfectly rectangular, with sharp square corners, we do not need a pattern. If your table is any other shape, a pattern may be needed. To find out and get directions, please call us before you order at 1-800-541-0271.

How to Make a Pattern    Our Mailing Address

Pioneer Table Pad Company
P.O. Box 40117
Bay Village, OH 44140-0117
How to avoid U.S. Postal Service delays

Are you mailing us a paper pattern?


Rules For Proper Measuring

  • Measure using only a flexible metal tape, not cloth or wood: they are not accurate.
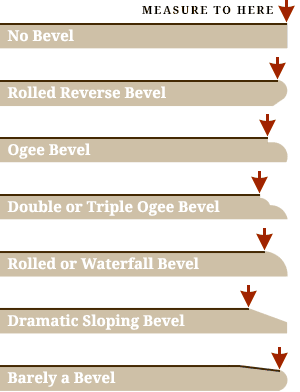
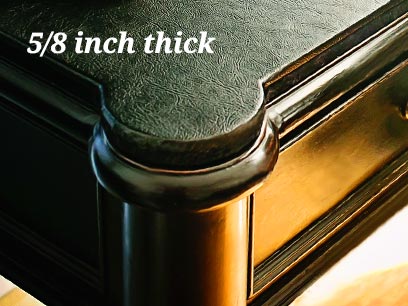
  • Measure the flat top surface only. Do not include any lip, bevel, rolled or sloping edges. How do I know what to measure?

Various rolled, ogee and sloping table cross-sections with edge of flat top surface marked: Measure to Here
(This bevel is most often only found on glass tables, and occasionally on wood. Many customers choose to cover this bevel. Please call and we will help you make this decision.)

Important: If your table is square or rectangular with rounded corners, a pattern is needed. Remember that rounded corners can have different sizes, from very small like a dime to very large like a basketball rim. Either way, rounded corners require you to make a pattern: choose a new shape, “Rectangle with rounded corners,” and then instructions on “How to Make a Pattern” will appear here.

If your table is perfectly square or rectangular, with sharp square corners, we do not need a pattern. (Think of a shoebox: it has straight sides, straight ends and four sharp square corners.)

80% of tables thought to be round are not true perfect circles. In order to give you the best fit, we would like you to measure the width and length. In our industry we consider the width to be along the split, and the length to be opposite or perpendicular to the split.

If your round table has no split, we would still like you to measure in two directions: pick one direction to be the width (for instance, following the grain) and then the opposite or perpendicular direction is the length.

If the width and length are off by even 1/8ʺ, we want to know. We draw round table pads with a giant compass and we will make this adjustment.

If the width and length are off by more than 1/2ʺ, a pattern is needed. How to make a pattern

Important: If your buffet/dresser is square or rectangular with rounded corners, a pattern is needed. Remember that rounded corners can have different sizes, from very small like a dime to very large like a basketball rim. Either way, rounded corners require you to make a pattern: choose a new shape, “Other shaped” buffet/dresser, and then instructions on “How to Make a Pattern” will appear here.

If your buffet/dresser is perfectly rectangular, with sharp square corners, we do not need a pattern. (Think of a shoebox: it has straight sides, straight ends and four sharp square corners.)
The main objective in making pads for a dropleaf table is to maintain versatility. This means we usually make one pad for each drop leaf, and a separate pad for the center section. On some dropleaf tables, the center section is solid. On others, it separates and opens for insert leaves, so we make a separate pad for each insert leaf.

Important: If your dropleaf table is oval, rectangular with rounded corners, or any other non-rectangular shape, a pattern is needed. Remember that rounded corners can have different sizes, from very small like a dime to very large like a basketball rim. All of these shapes require you to make a pattern as instructed below.

If your dropleaf table and leaves are perfectly rectangular, with sharp square corners, we do not need a pattern. (Think of a shoebox: it has straight sides, straight ends and four sharp square corners.)
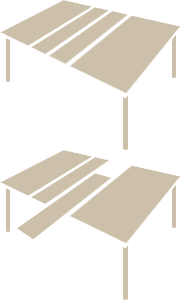
Important: If your harvest dropleaf table is square or rectangular with rounded corners, or any other non-rectangular shape, a pattern is needed. Remember that rounded corners can have different sizes, from very small like a dime to very large like a basketball rim. Either way, rounded corners require you to make a pattern as instructed below.

If your harvest table and leaves are perfectly rectangular, with sharp square corners, we do not need a pattern. (Think of a shoebox: it has straight sides, straight ends and four sharp square corners.)

When leaves slide into the ends, they do not usually fit flush. This is because the leaves and the main table have been finished with a bevel on all four sides, creating a “V” or gap that we need to account for. That is why it is important to measure only the flat top surface of each section, and why we ask for the length of the table without leaves above.

Please call us at 1-800-541-0271 so we can do the math and explain how we will accommodate the gap.

We also ask for the size of each leaf if you include leaves in your order: do not assume the leaves are the same.

Important: If your refectory table is square or rectangular with rounded corners, or any other non-rectangular shape, a pattern is needed. Remember that rounded corners can have different sizes, from very small like a dime to very large like a basketball rim. Either way, rounded corners require you to make a pattern as instructed below.

If your refectory table and leaves are perfectly rectangular, with sharp square corners, we do not need a pattern. (Think of a shoebox: it has straight sides, straight ends and four sharp square corners.)

How to Make a Pattern

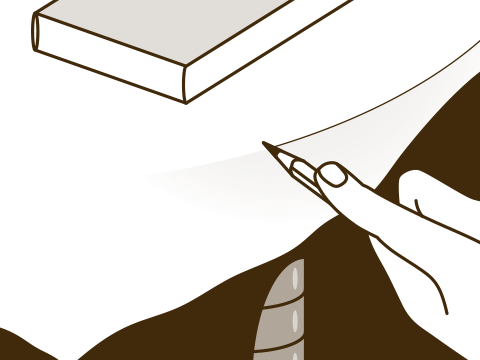
Illustration: tracing a table pad pattern with book for weight Please follow these directions carefully. The fit of your table pad can only be as nice as your pattern and as accurate as your measurements. Please do not hesitate to call 1-800-541-0271 before getting started if you have any questions.

  • You can use either our pattern paper or wrapping paper (it works perfectly) to make a pattern.
  • If you’re using our paper, open it up and flatten it out. Then make sure the straight edge of the paper is perfectly flush with the center split. Or if you’re using wrapping paper, align the nice straight edge of the paper, as it comes off the roll, with the center split of your table.
  • Make a pattern of just one half of your table. If your paper does not completely cover half of the table, attach another piece by overlapping it only 1/2ʺ. Use scotch tape along the seam.
  • If your table has no center split, we need a pattern of the complete top. For servers or buffets, line up the paper with the back edge.
  • Use heavy objects like books to keep the paper from moving.
  • Using only a lead pencil, drag or rub the side of the lead against the very top edge of your table’s flat surface only. Tracing tips

Tip #1  The point of the pencil should be pointing towards the table, not towards the floor.

Tip #2  Hold the pencil as parallel as possible to the flat surface. Do not hold the pencil like a rocket ship.

  • Do not for any reason cut the pattern to get it into the envelope; just fold it again.

Illustration: tracing a table pad pattern with book for weight Please follow these directions carefully. The fit of your table pad can only be as nice as your pattern and as accurate as your measurements. Please do not hesitate to call 1-800-541-0271 before getting started if you have any questions.

  • You can use either our pattern paper or wrapping paper (it works perfectly) to make a pattern.
  • If you’re using our paper, open it up and flatten it out. Then make sure the straight edge of the paper is perfectly flush with the crack where the drop leaf meets the center. Or if you’re using wrapping paper, align the nice straight edge of the paper, as it comes off the roll, with the crack.
  • Make a pattern of just one drop leaf.
  • Diagram: rectangular table with rectangular center section (no pattern needed) and egg-shaped oval table with non-rectangular center section (center pattern needed)Only make a pattern of the center section if it is not rectangular in shape.
  • Use heavy objects like books to keep the paper from moving.
  • Using only a lead pencil, drag or rub the side of the lead against the very top edge of your table’s flat surface only. Tracing tips

Tip #1  The point of the pencil should be pointing towards the table, not towards the floor.

Tip #2  Hold the pencil as parallel as possible to the flat surface. Do not hold the pencil like a rocket ship.

  • Do not for any reason cut the pattern to get it into the envelope; just fold it again.

Our Mailing Address

Pioneer Table Pad Company
P.O. Box 40117
Bay Village, OH 44140-0117
How to avoid U.S. Postal Service delays

Print These Instructions


Your Table Pad

Accessories

Price $Call
$Call shipping

Or order by phone
1-800-541-0271
Exclamation point symbolTo finalize the price, you must take measurements. See instructions in Step 4.
Exclamation point symbolTo finalize the price, you must take measurements. If you have not called to verify that we have your table model number on file, you must either use our printable corner guide or make a pattern. See instructions in Step 4.
Exclamation point symbolTo finalize the price, you must take measurements. If you have not called to verify that we have your table model number on file, you must also make a pattern. See instructions in Step 4.
Exclamation point symbolTo finalize the price, you must take measurements. If you have not called to verify that we have your buffet model number on file, and if your table is not a rectangle with round corners, you must also make a pattern. See instructions in Step 4.
Exclamation point symbolTo finalize the price, you must take measurements. If your table isn’t a rectangle with square or round corners, you may also need to make a pattern. See instructions in Step 4.
Exclamation point symbolTo finalize the price, you must take measurements. If your table isn’t a rectangle with sharp square corners, you may also need to make a pattern. See instructions in Step 4.
Questions? 1-800-541-0271
When shipping outside the continental U.S. or to APO/FPO, please call for a quote.

Order Total

Visit PioneerTablePads.com to Get a Quote instantly or view Prices at a Glance.


Billing Address (If different)


Payment Method


(For Visa, Discover and MasterCard, this is the three digits on the back of the card at the end of the number. For American Express, it is the four digits on the front of the card above the end of the number.)


 
Mail (along with your pattern, if required) to:
Pioneer Table Pad Company
P.O. Box 40117
Bay Village, OH 44140-0117


Phone  1-800-541-0271        Fax  1-440-930-2558

 
Copyright © 1987–2024 Pioneer Table Pad Company, All Rights Reserved.

Shipping Address